I’m a big fan of OpTech Straps. I had ordered a OpTech Classic Pro Loop Strap for my GF1 the other day. I wanted to use the strap from my D200 in the mean time. When I tried to attach the Pro Loop connectors, I was sadly frustrated by the tiny lugs on the GF1. I took a little bit of my hacker instinct, and decided to cut the leather attachment threading to open the loops up and attach them in a “permanent” way. The results are great and seem very secure. See more info below.
– Sean
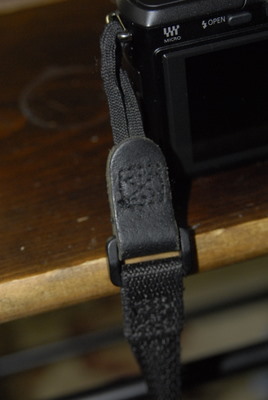
Close Up of the leather that gets un-stitched
I used an x-acto knife to cut the threads in the leather shown here. The threads are in a box pattern with an “X” inside. The loops are already open, and don’t need to be cut once the stitching is removed. Next, i put the open loop through the GF1 Lugs, positioned the leather back on them so the strap would hang with the buckles facing in. Next, I put a few stitches in to hold everything in place so I could stich it back up without things moving around. Make sure your new stitches go through both parts of the loop – I positioned the loop ends carefully so that they were under the original needle holes. Then finish up the stitching, and repeat on the other connector.

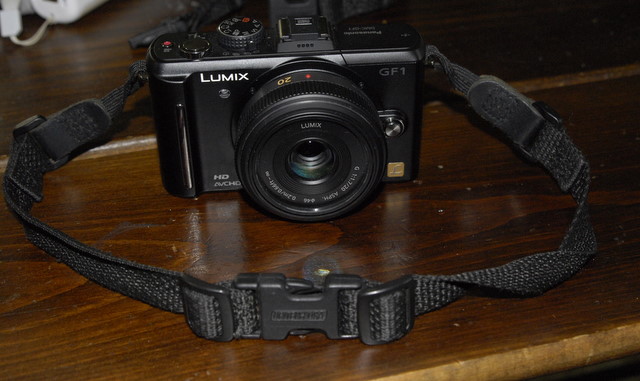
Full Strap from my D200 now attached
I’m very happy with the results. The only downside is that the loop connectors would need to be cut off to take them off the GF1. I’ve never removed the connectors from my D200 until I did this mod…. so not a big deal for me.
The loop connectors attached together in “Hand Strap” configuration
In this photo, you can see the 2 loop adapters connected to each other, with the padded portion of the strap removed. This creates a nice hand strap when the full strap is not needed. The Optech snap in connectors are very secure and have never accidentally disconnected on my D200.
Let me know if you have any questions by leaving a comment.
Not sure why you even bothered to post this, there is no information of how you mod the strp or how you attach it back. Just some shots after its done. And the photos look bad too. Your other photos from GF1 looks pretty dull too, bad color, bad dynamic range, boring angel, my wife with her P&S took much better photos than these, if you don’t want to spend more than 5 min on your blog, don’t blog, this is bad promotion for GF1. At least use a better picture hosting service which don’t compress your photos so much.
If you read the post, there is plenty of information on how to do the mod… sorry if you can’t understand it. Also… I’m not a fanboy promoting the GF1… just posting my thoughts on how it works for me… and showing some pretty typical results of what the images look like when they are not overprocessed. I’m not a big fan of over processed HDR images or over saturated “colorful” photos. The images are pretty representative of what the camera delivers.