After using the X100V for over a year and a half, it seems like a good time to summarize my experience with the camera. I had strong feelings about the camera when I purchased it, and apparently it has now become the trendiest camera on the internet.
The following are my impressions of the camera and images, followed by more general thoughts about the camera. Click here to jump directly to the full image gallery.

Why did I buy one? At the time I purchased the camera, I was trying to decide how to consolidate my Micro 4/3rds and Nikon cameras and lenses into one system. I actually considered selling off everything and going all in with Fujifilm. I liked their dedication to the APSC sensor size, and they basically were splitting the difference between the advantages of my 2 systems. In the end, I realized that I was mostly using the Panasonic 17mm f/1.7 (40mm equivalent) lens on the GX85. Whenever I went out to do “serious shooting” I packed up the D800 and big lenses. I sold off / gave away all of my Panasonic gear, and snapped up an in-stock X100V when I got a 10% off discount at Best Buy.

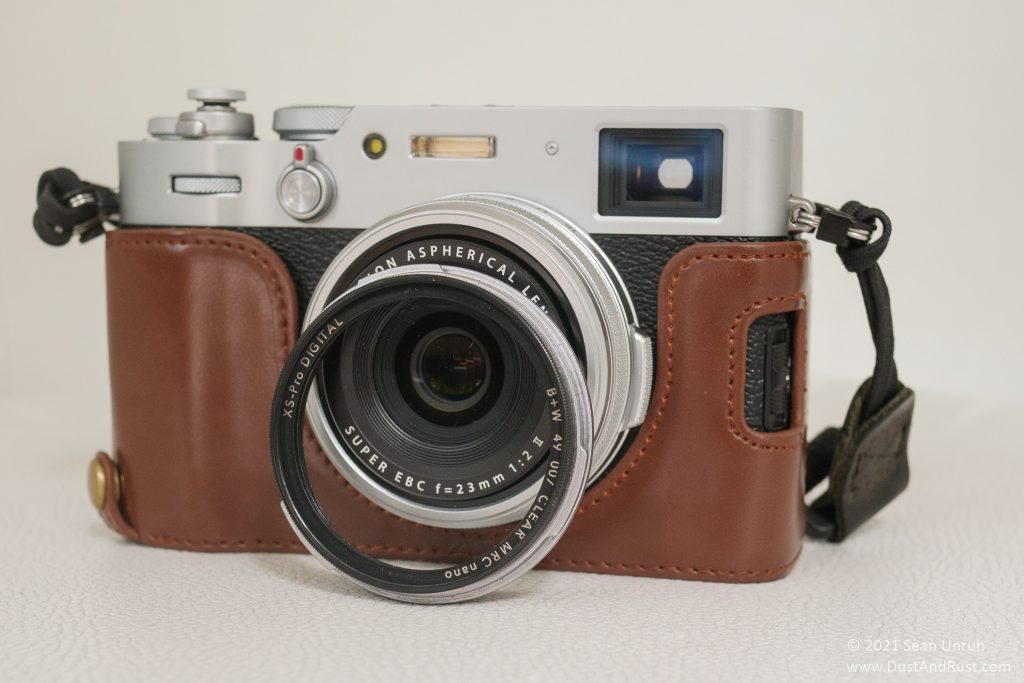
Design and Build : Obviously, the looks and ergonomics are a big selling point. For me, the camera has some magic in the build quality and aesthetics that makes me want to hold it, use it, and sometimes just put it on the desk and look at it. This still holds true for me – the camera is a classic. I always put a screen protector on my cameras, so the LCD is scratch free. I did a check for dust on the sensor, and I am happy to report that there is nothing visible at F/16. This is probably due to the cameras weather sealing and having filter attached 100% of the time. I sometimes see the rear scroll wheel skip backwards when zooming images on playback when rotating the wheel quickly. There are reports in the forums about the rubber coating on the eyepiece peeling off, but so far I don’t see any peeling.

Dials and Menus : My bread and butter camera has been the Nikon D800 for many years. It has many dedicated buttons and a “press a button and turn a dial” philosophy. It took some time to decide on what my Q menu settings would be. Initially I had the settings setup to create recipes, and later changed to a more concise menu with things like self timer, focus mode, wb and other settings I found myself actually using day to day. I use the camera dials to change shutter speed, aperture and exposure comp and leave the ISO dial in auto mode, and I have the lcd set up to move the focus point.

Film Simulations : I have played around with the built in film simulations and recipes. This feature will appeal to those that want to post images straight out of the camera and want to choose a look before they press the shutter. I tend to shoot with the built in Provia profile, and spend some time in Lightroom. While Lightroom does have camera matching profiles for all of the built in simulations, they are not an exact match for what Fuji is doing in the camera. You will need to shoot raw, and process the images in X Raw Studio (with the camera connected to your pc) if you want to use the “real” Fujifilm simulations post capture.

Image Quality : The 26mp BSI XTrans IV sensor is used in many Fujifilm cameras, so there are many in depth reviews around on the web. The raw files have a nice malleability in Lightroom with the ability to recover some slightly blown highlights. The auto white balance works pretty well, and you have the ability to easily shift it if you prefer warmer or cooler images. Color noise seems a little better than some other cameras at high iso settings and cleans up nicely with the sliders in Lightroom. I find the luminance noise more “film grain” like than some other cameras I own.

The lens is sharp enough at all apertures. Looking at my lightroom data, the majority of my shots are at f/4 and f/2.8 with f/2 reserved for really low light, and smaller apertures for added depth of field as needed. Like most high-end large fixed lens cameras I have used, the lens seems well matched to the sensor. For stills photography, I have no complaints about the autofocus

Built in Flash : The built in flash is one of the must-have features for me. When shooting in poor lighting, or even outside when the subject is in a shadow, the flash can make or break some images. In TTL mode, the camera will increase the ISO to make the background look more natural, so don’t be surprised if the images have more noise than expected. You can also set the shutter speed very low and lock in the ISO if it bothers you (aka “dragging the shutter”).
Flash Hack : I use a warming gel from the Rosco Filter Swatch book with some clear 3m tape cut to fit over the flash. This can be used to tweak the flash color to taste.

Thoughts on the Internet Hype : The X100V is in a shrinking group of fixed lens, large sensor compact cameras. Besides the retro styling and build, it has one main party trick… the hybrid viewfinder. The lens is nice, if you like the single focal length. Yes, you can use the digital zoom or stitch a panorama together but that may not be ideal in all situations. There are so many great cameras available today, that I personally wouldn’t recommend it without pointing out what your money can buy. Is the X100V a magical unicorn that will make you an Instagram or TikTok star? Probably not. At this point, the camera has become a clickbait meme. Here are some examples of the madness on YouTube :
Summary : The X100V is a fantastic camera that makes a fun addition to my larger Nikon gear. I am more likely to pick it up, and take it out for a walk around town, or a night out with friends. I like the 35mm focal length, I love the retro design and I am very happy with the raw images. I personally would not pay anything over the list price for it, and if you don’t really care about the hybrid viewfinder, or the retro styling, there are so many other options to consider.
X100V Review Gallery